
This series of electronic universal testing machine is a classic practical model developed by our company, and is also the mainstream model currently produced.
1. Product appearance diagram:
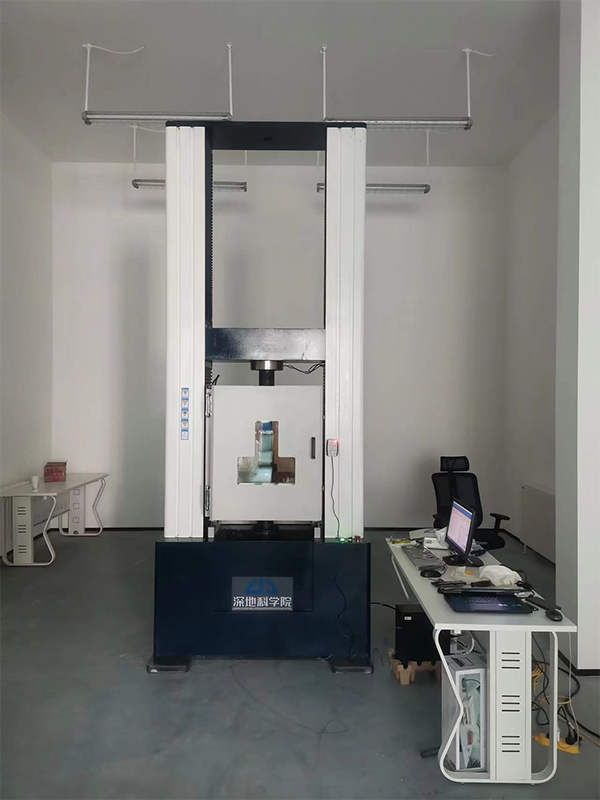
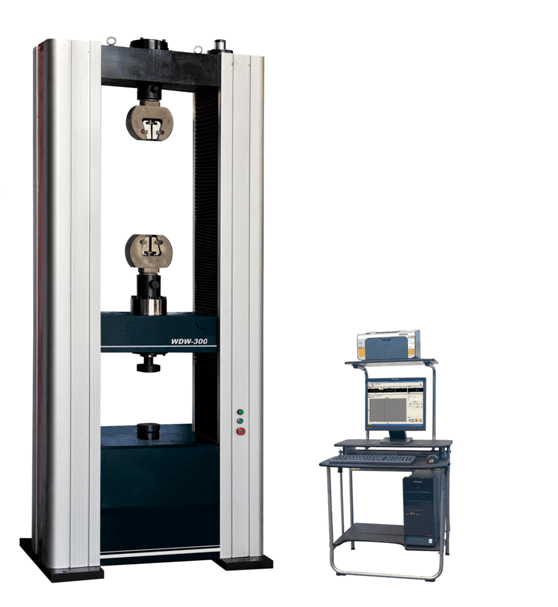
The picture is for reference only
2. Specifications and models:
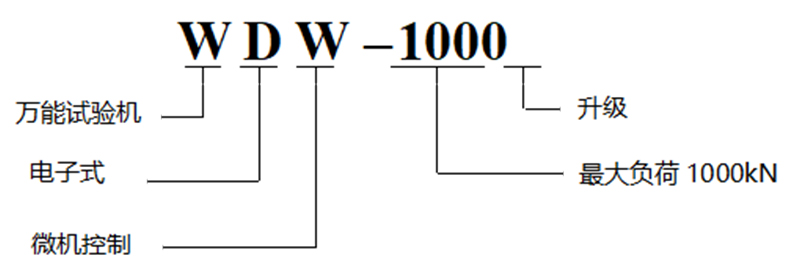
3. Applicable standards:
GB/T 2611-2007 "Testing machine general technical requirements"
JB/T 7406.1-1994 Testing Machine Terminology Material Testing Machine
GB/T 16491-2008 "Electronic universal Testing Machine"
GB/T 16825.1-2008 "Testing of static uniaxial testing machines - Part 1: Testing and calibration of force measurement systems for tension and/or pressure testing machines"
GB/T 22066-2008 "Evaluation of Computer Data acquisition System for Static Uniaxial Testing Machine"
JJG 139-1999 "Tensile, Pressure and universal Material Testing Machine"
JB/T 6146-2007 "Extensometer Technical Conditions"
JB/T 6147-2007 "Testing machine packaging, packaging marks, storage and transportation technical requirements"
GB/T 228.1-2010 "Metal materials tensile test Part 1: room temperature test method"
GB/T 7314-2005 "Metal material compression test method at room temperature"
GB/T 232-2010 "Bending test Method for Metal Materials"
Other non-metallic test standards
4. The main technical parameters:
(1) Host parameters:
Number of columns: 6 columns (4 columns 2 screw);
Maximum stretching space (mm) : 900;
Maximum compression space (mm) : 1700;
Maximum travel of moving beam (mm) : 1900;
Test width (mm) : 800;
Beam adjustment maximum speed (mm/min) : 200;
Column diameter (mm) : diameter 100;
Screw specification: GD100*20-5;
Table size (mm) Length × width × height: 800×400×230;
Worktable thickness (mm) : 230;
Upper beam thickness (mm) : 60;
Moving beam thickness (mm) : 260;
(2) Measurement parameters:
Maximum test force (kN) : 1000;
Testing machine grade: 0.5;
Test force measurement range: 0.4% ~ 100%F.S (maximum load);
Test force measurement accuracy: better than the indicated value of ±0.5%;
The resolution of the test force: 1/300000 of the full scale (the full scale has only one resolution, without classification);
Displacement measurement accuracy: ±0.5%;
Displacement resolution: 0.4μm;
Displacement indication error: within ±0.5% of the indication value;
Deformation resolution: 0.001mm;
Relative error of deformation indication value: within ±0.5%;
Large deformation measuring range: 10 ~ 800mm (if optional large deformation measuring device);
Large deformation indication error: within ±0.5% of the indication value (such as selecting a large deformation measurement device);
Large deformation measurement resolution: 0.008mm (if optional large deformation measurement device);
(3) Control parameters:
Stress control rate range: 0.005 ~ 5% FS/s;
Stress control rate accuracy: rate < 0.05%FS/s, within ±2% of the set value, rate ≥0.05%FS/s, within ±0.5% of the set value;
Strain control rate range: 0.005 ~ 5%FS/s;
The accuracy of strain control rate is within ±2% of the set value when the rate is < 0.05%FS/s, and within ±0.5% of the set value when the rate is ≥0.05%FS/s.
Displacement control rate range: 0.001 ~ 200mm/min;
Displacement control rate accuracy: when the rate is < 0.5mm/min, it is within ±1% of the set value; when the rate is ≥0.5mm/min, it is within ±0.2% of the set value;
(4) Machine parameters:
Host size (mm) : 1450×1300×2700;
Weight (kg) : 4500;
Power (kW) : 20;
Power supply: three-phase, 380V;
Use environment: no vibration, no dust; Room temperature (15-25℃); Humidity <70%; No vibration, no corrosive media, no strong magnetic field interference; The voltage fluctuation of the power supply shall not exceed 10% of the rated voltage.
5. Functions and uses:
This series of electronic universal testing machine is a classic practical model developed by our company, and is also the mainstream model currently produced. Is my company learning from Shimadzu technology, on the basis of previous generations of models, after two new upgrade design and development, the main structure and measurement and control system are greatly upgraded, the structure is more reasonable, the function is more perfect, is the industry's leading technology of a new generation of electronic universal testing machine. This series of testing machine has been through a lot of practice and continuous improvement, technology and process mature, high reliability, low failure rate, by the market and users of praise and welcome.
The testing machine adopts the Japanese Panasonic digital AC servo speed control system and servo motor as the driving system with high speed regulation precision and stable performance. The specially designed synchronous gear belt deceleration system and ball screw pair drive the moving beam movement of the testing machine. The control and data processing software based on database technology based on Windows operating platform realizes the screen display of test force, test force peak, cross beam displacement, sample deformation and test curve. All the test operations can be completed by mouse input on the computer screen, which has a good man-machine interface and easy operation. The independent dual-channel digital programmable amplifier realizes the real sense of physical zero adjustment, gain adjustment and test force measurement of automatic shift, zero adjustment and calibration, without any analog adjustment links, the control circuit is highly integrated, completely eliminate the potentiometer and other mechanical adjustment devices, simple structure, reliable performance. The machine can realize the closed-loop control of test force, sample deformation and beam displacement, and can realize the test of constant force, constant displacement, constant strain, constant rate load cycle and constant rate deformation cycle. The user can use the PC expert system to set the control mode of constant stress, constant strain, constant displacement, etc., and the control mode can be smoothly switched without disturbance. It can realize data processing in line with GB, ISO, JIS, ASTM, DIN and other standards, especially with good scalability, and the processing results can be stored on disk in the form of ASCII code, which provides convenience for post-processing such as reanalysis of test data, database management, and network transmission.
This series of electronic universal testing machine has powerful function and wide use. It can be used for tensile, compression, bending, shearing, stripping, tearing, extraction, ring stiffness and other mechanical properties of various metal, non-metal and composite materials. Suitable for metal materials such as wire, metal foil, metal sheet and metal bar, as well as plastic pipes, plastic profiles, waterproof coils, geotextile, wire and cable, textile, fiber, rubber, ceramics, concrete, adhesive, food and medical packaging, film, wood, paper and other non-metallic materials mechanical test. It can be widely used in machinery manufacturing, vehicle manufacturing, aerospace, petrochemical, wire and cable, paper making, textile, construction materials and other manufacturing enterprises, for quality supervision and inspection departments, research institutes and other research departments, as well as colleges and universities for teaching and demonstration.
In the metal tensile test, the experimenter can clearly observe the whole test process such as low carbon steel and cast iron. By repeated loading in different curve segments, the force-displacement (deformation) curve can directly verify Hooke's law and observe the cold hardening phenomenon. For materials without obvious physical yield phenomenon, the specified non-proportional extension strength can be determined by hysteresis loop method or stepwise approximation method. In the process of compression, it is convenient to observe the compression yield phenomenon and strengthening phenomenon of low carbon steel, the compression failure process of cast iron and the fracture shape. The n and r values of the material can also be detected.
For non-metallic material test, large test space, wide speed range, and various accessory configurations can meet the testing needs of various non-metallic materials.
A variety of alternative test accessories and test standards can meet the test of different materials, to achieve a multi-purpose effect.
 |
 |
 |
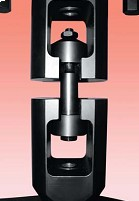 |
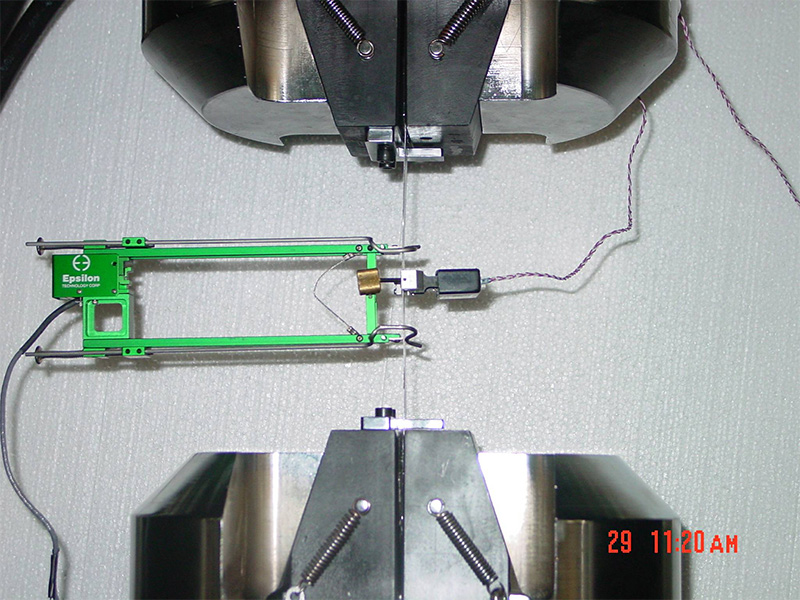
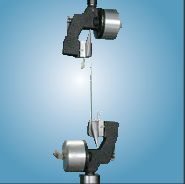
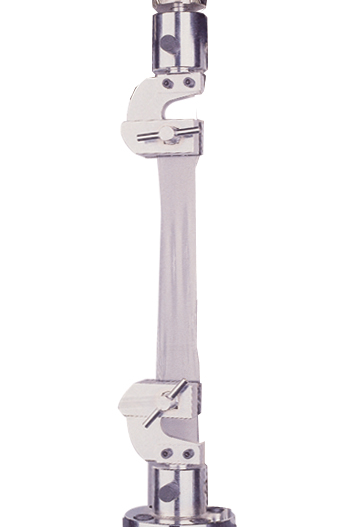
| Wire tensile test | Sheet metal tensile test | monofilament tensile test | bolt tensile test |
 |
 |
 |
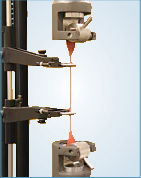
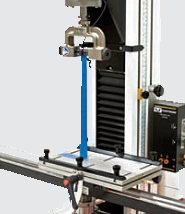
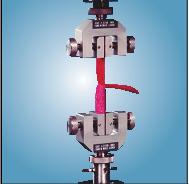
| Rubber tensile test | film tensile test | plastic packaging tear test |
 |
 |
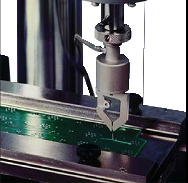 |
| 90 degree stripping test | 180 degree stripping test | Electronic device pull-out test |
 |
 |
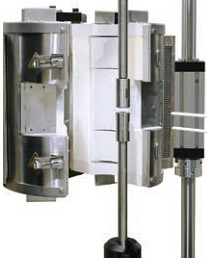 |
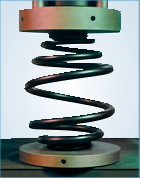
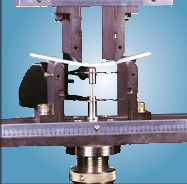
| Spring compression test | four-point bending test | high temperature tensile test |
6. Technical features and advantages:
1. No pollution, low noise, easy operation, high efficiency;
2. The main shell is made of aluminum alloy shell, beautiful and generous in shape;
3. The host as a whole floor vertical structure, large rigidity, stable performance, beautiful appearance;
4. Tensile and compression are realized in independent double space, avoiding the cumbersome replacement of different test accessories when using the same space;
5. The main machine structure is strong and durable. The thick ball screw and guide light screw, the thickened beam and the base form a strong rigid frame to meet the test of high-strength materials;
6. The upper and lower beams and worktables of the main machine are synchronized CNC machining to ensure excellent alignment. In the axial test, the influence of lateral force on the sample under load is minimized to obtain accurate stress and strain results;
7. The lead screw is precision grinding ball screw, the lead screw is made of cast copper material, wear-resistant. The friction coefficient of the lead screw pair is small, the transmission efficiency is high, the precision is high, the strength is high;
8. The deceleration mechanism composed of reducer, synchronous tooth belt, precision ball screw pair, simple structure, ensure the synchronous movement of the lead screw, and help the system alignment;
9. High-power motor with reserve power, preloaded bearing, low tension synchronous gear belt, precision ball screw pair, can minimize the energy stored during the test process, so as to obtain better test performance and obtain more accurate modulus and strain values. The effect is particularly significant when testing high-strength materials, such as aviation composite materials and metal alloys;
10. The use of Japan Panasonic AC servo motor and speed control system to control the test process, high control accuracy, smooth, efficient, low noise (basically no noise at low speed). And the control speed range is greatly widened (0.001-500mm/min), which is not only conducive to the low-speed test of conventional materials (metal, cement, concrete, etc.), but also conducive to the high-speed test of non-metallic materials (rubber, film, etc.), but also convenient to quickly adjust the test space when no load, saving auxiliary test time. The test speed meets the requirements of all conventional metal and non-metal materials in China.
11. Multi-specification fixture switching device, multi-accessory selection, can realize the mechanical testing of a variety of materials, giving the equipment more test functions;
12. The concentric ring and positioning pin fully ensure the upper and lower coaxiality of the test fixture, so that the sample is completely stressed in the axial direction;
13. The force value is measured by imported high-precision spoke-type load sensor with high comprehensive accuracy, high sensitivity and good repeatability. The accuracy of the test process and parameters can be ensured by not being affected by external force in the test after random calibration.
14. Tensile, compression and other tests the sensor force direction is the same, calibration, calibration is simple and convenient;
15. Sensors of different specifications can be configured according to requirements, so that the test range is greatly widened to meet the measurement requirements of different test loads;
16. High precision electronic extensometer or large deformation extensometer is used for deformation measurement;
17. The displacement measurement is realized by the built-in displacement measurement system of AC servo motor;
18. The safe portable wireless remote control creatively integrates a number of functions, which is very convenient to use and operate, and greatly simplifies the strong current configuration and reduces the use of discrete electrical components, thus effectively reducing the electrical failure rate;
19. It can realize the fast/slow lifting adjustment of the beam when the sample is installed, and the operation is flexible and can be switched at will;
20. With the function of returning to the initial position after the test, efficient and fast;
21. With perfect limit protection function and overload and overcurrent protection, test break automatic stop and other functions, reliable and safe;
22. Configure a high-performance intelligent all-digital independent controller, adopt all-digital PID regulation, realize a hardware-based parallel sampling mode, can realize a variety of closed-loop control modes such as constant rate stress, constant rate displacement, and constant rate strain, and can realize smooth switching between different control modes without disturbance;
23. The measurement and control system is equipped with multi-function test software package and adopts VXDs high-speed data acquisition technology to realize high-speed acquisition of multi-channel data;
It can analyze and process the test results according to the requirements of different test methods, with human-computer interactive programming control function, convenient to add new test standards; It has a powerful graphical operation function, which can display the test curve and test data in real time, and has the function of curve scaling, graph magnification, interception, and cursor following display. With a complete test curve, test data storage function; With single test report output and batch test report output printing function;
24. With network interface, can achieve data networking and remote control functions;
25. The equipment is cost-effective. The quality of imported equipment, the price of domestic equipment.
7. Structure and performance:
The testing machine is composed of four parts: main engine part, power system, measurement and control system and test accessories.
(A) Host structure:
The main machine is composed of an upper beam, a moving beam and a workbench through a column and a ball screw to form a rigid floor frame structure. A tensile attachment is installed between the upper beam and the moving beam, which can be used for tensile and tearing tests on metal or non-metal material samples; Compression and bending attachments are installed between the moving beam and the workbench, which can be used to test the compression and bending of metal or non-metal material samples.
Thick ball screws and columns, thickened beams and workbenches ensure high rigidity and robustness of the frame. Fully meet the test of high-strength materials, such as aviation composite materials, metal alloys, the effect is particularly significant.
Precision integral CNC machining ensures excellent neutrality, coupled with a stable and precise rigid guide column system, ensuring that the specimen is subject to minimal lateral force under load.
(2) Power system:
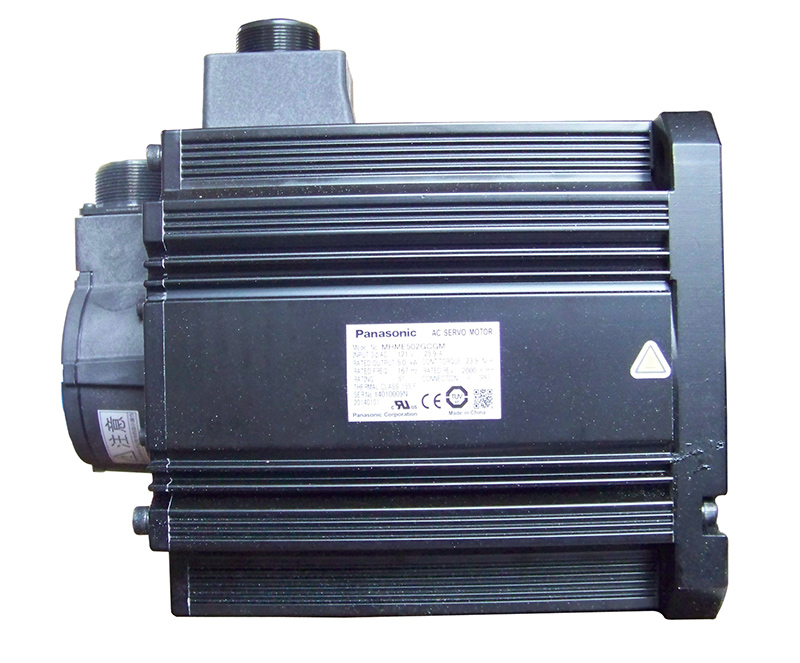 |
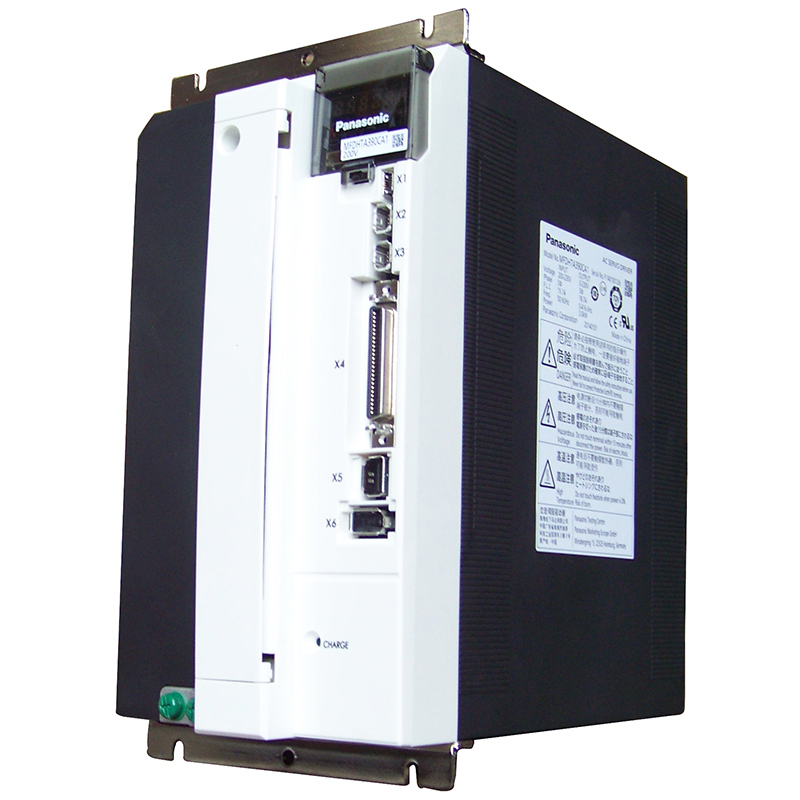 |
| Servo motor diagram | Servo motor driver diagram |
The drive and deceleration systems are integrated under the workbench, making them compact and simple.
The testing machine adopts Japan Panasonic digital AC servo speed control system with high precision and stable performance and servo motor as the drive system, and the speed control system is composed of Taiwan Liming reducer and synchronous gear belt reducer.
The AC servo motor drives the rotation of the double ball screw through the deceleration system, thus driving the moving beam to move up and down to realize the loading of the sample. The key component belt adopts the synchronous belt of Gates series, the specially designed deceleration mechanism, the symmetrical drive, the transmission is more stable, to ensure the synchronous movement of the lead screw, the beam loading balance, and to help the system alignment.
(3) Measurement and control system:
It consists of high precision load sensor, high precision electronic extensometer, servo motor built-in displacement measurement system, servo motor, special independent controller, special measurement and control software, mainstream brand microcomputer measurement operation and automatic control system.
The load sensor is installed on the lower part of the moving beam and is used to measure the size of the test force.
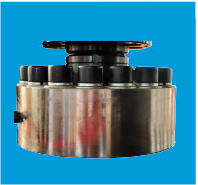
Load sensor diagram
The AC servo motor has a built-in displacement measurement system for measuring the displacement of the beam, and can also approximately replace the deformation of the sample (the beam is thick enough, the lead screw is double nuts, and the system gap is eliminated).
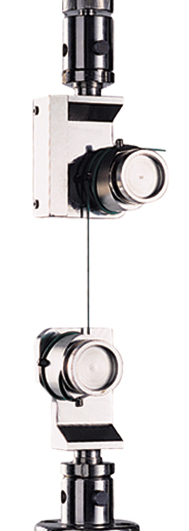
For some metal materials, the testing machine is equipped with an electronic extensometer to measure the deformation of the sample. The double collet of the extensometer holds the two points of the sample marker distance and measures the separation distance between the two points of the sample marker distance in real time, that is, the deformation of the sample.
For non-metallic materials with large deformation, the displacement of the beam can be used to replace the deformation. When you need to measure the deformation accurately, you can also choose a special large deformation extensometer.
The controller and software were developed specifically for material testing machines. The software is compatible with Windows98/2000/XP/Win7 operating system. Manage test data using a standard database, integrate more than 200 national and industry test standards, and support batch testing. It can complete the real-time control, detection, data processing, result display, curve drawing, print-out, remote transmission of test force, sample deformation, displacement and other parameters.
Controller: full digital three closed loop measurement control system
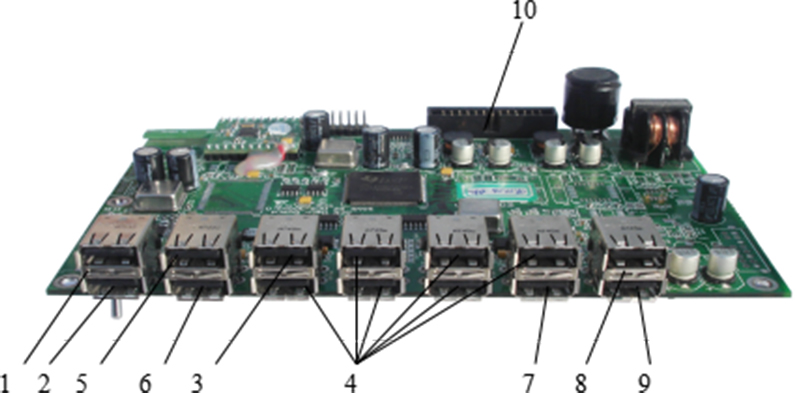
Independent controller diagram
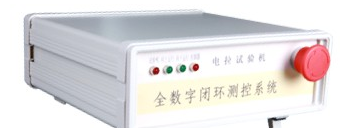
Controller board diagram
1.USB slave port communication interface; 2. Analog signal sensor interface 1; 3. Analog signal sensor interface 2;
4. Analog signal sensor interface 3 ~ 8; 5. Photoelectric encoder interface 1; 6. Photoelectric encoder interface 2;
7. Inverter running direction control interface; 8. D/A analog control interface; 9. I/O input/output control interface; 10. Integrated interface.
1. Main features of the controller:
The testing machine will develop in the direction of high performance, humanization - intelligence, networking, automation, integration - high cost performance. The independent controller integrates measurement and control functions in one, can complete various test operations, and provides a new solution for testing machine measurement and control and data processing, which is an important part of leading the development of testing machine technology.
(electronic universal special) Independent controller is a new generation of static testing machine special controller developed by our company for many years and jointly with cooperative universities. The controller integrates powerful measurement and control functions, data processing functions, human-computer interaction functions, network functions and peripheral functions, providing a highly integrated single-system solution for the testing machine. High performance, cost-effective.
The system consists of three signal conditioning units (test force unit, displacement unit, sample deformation unit), control signal generator unit, servo motor control unit, necessary I/O interface, software system, etc.
The closed-loop control loop of the system consists of measuring sensors (load sensors, displacement sensors, deformation extensometers), servo motors, controllers (each signal conditioning unit) and servo amplifiers together to form multiple closed-loop control loops. DSP technology and neuron adaptive control algorithm are adopted to achieve full digital closed-loop control, and the most advanced PID professional control chip and multi-channel high-speed data acquisition and processing module are adopted. The mixed architecture of DSP+MCU is applied to the full digital three-closed-loop measurement control system, the resolution is not less than 1/350000FS, and the measurement process is not divided. It can realize a variety of closed-loop control modes such as constant rate test force, constant rate displacement and constant rate strain, and the control mode can be arbitrarily combined and smoothly switched.
With network interface, data networking and remote control can be realized.
Fully support GB/T 228-2010 metal tensile test standards and all kinds of non-metal tensile test standards.
2. Main function indicators of the controller:
| Function Item | Technical Index | Application |
| Load Measurement | Sampling frequency: 30Hz/120Hz; Resolution: 3*10ˉ6FS | Force, torque and other measurement |
| Deformation Measurement | Sampling frequency: 30Hz/120Hz; Resolution: 3*10ˉ6FS | Extender Measurement |
| Displacement measurement | Capture frequency: 2MHz | Servo motor position non-destructive measurement |
| Large deformation Measurement (top) | Capture frequency: 200kHz | Large deformation optical code signal measurement (top) |
| Large deformation measurement (bottom) | Capture frequency: 200kHz | Large deformation optical code signal measurement (top) |
| Servo motor control | PWM control frequency: 2MHz | Servo motor position control |
| Digital signal input | 2 Digitallnput | Upper and lower limits |
| USB communication | USB2.0 specification, 480Mbps | And host computer communication |
|
Wireless remote control Fast operation |
Control distance: 5m; Object Password lock | Quick operation |
| Smart test software | Equipment management, sample plan, test report, curve analysis | Supports more than 200 test methods and standards |
| Digital Measurement Channel | The standard is 3. Among them, 1 channel is a high-speed digital signal measurement channel with a frequency range of 0~2MHz, which can be directly connected to the photoelectric encoder of the servo motor; The second channel is a medium speed digital signal measurement channel with a frequency range of 0~200kMz | Displacement measurement, large deformation measurement, creep measurement, etc |
| Sampling frequency | 30Hz, 120Hz. The default value is 30Hz | |
| Signal bandwidth | 6Hz at the sampling frequency of 30Hz and 23Hz at the sampling frequency of 120Hz | |
| Resolution | 1/350,000 of full scale | |
| The measurement range of 0.5 grade machine | Can reach ±0.4%FS~±100%FS, and the whole process is not divided | |
| Can expand 6 load, deformation measurement channels, can expand the hydraulic clamping control function | ||
Special measurement and control software
(electronic universal) Chinese version of the special measurement and control software has a multi-functional software package, can be selected according to the requirements of different industry users, meet the industry testing standards, with modular, open design, not only provides GB, ASTM, DIN, ISO, JIS and other standards commonly used basic test solution results, Users can also design different calculation formulas according to their own needs to solve the required results, and provide the test report template for users to design freely, in order to meet the user's personalized demand style test report. The user interface supports WindowsXP and earlier versions of the operating system, and also supports Windows7, Linux and other operating systems.
1. Online/offline: Some software functions can be run offline.
2. User management: Multi-user management and hierarchical user rights management. Users need to enter their own user name and password when logging in. Administrators have the highest rights, can manage user rights, and authorize different operators to use different software functions.
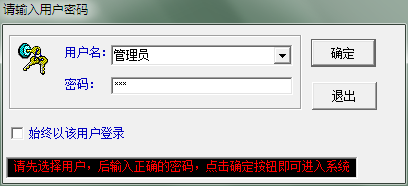
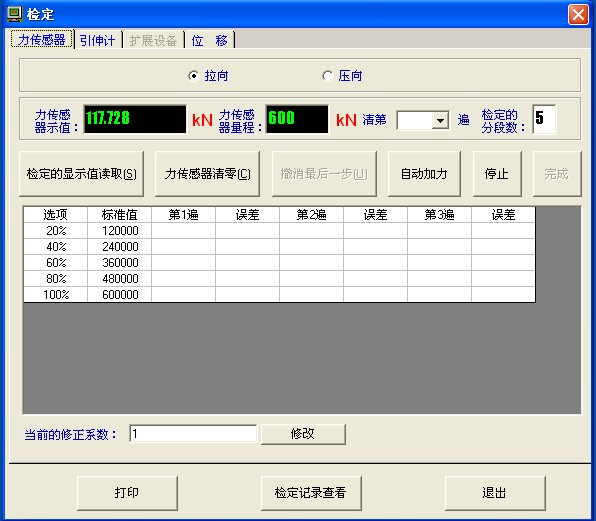
3. Device management functions: device parameter setting, device online or offline management, controller parameter setting, PID parameter online or offline adjustment, sensor direction identification, sensor calibration, sensor verification, switch and other functions.
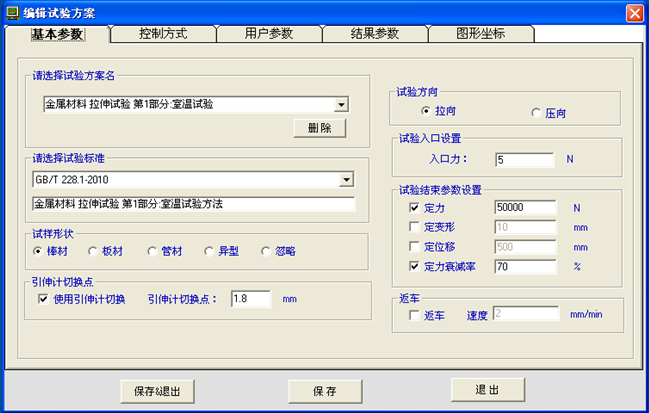
4. Test scheme: (1) In line with GB/T228-2010 fast tensile control mode; (2) The edited test scheme can be imported to other test machines for use; (3) By editing the operation plan, it can realize the combination operation of force control, displacement control, deformation control and other control methods, so as to meet the needs of any static test operation. Test parameters can be set, such as operation parameter setting, sample parameter setting, operation condition setting, test result project management. Test run management can be carried out, such as starting test run, test run process management, test state management and indicator display management.
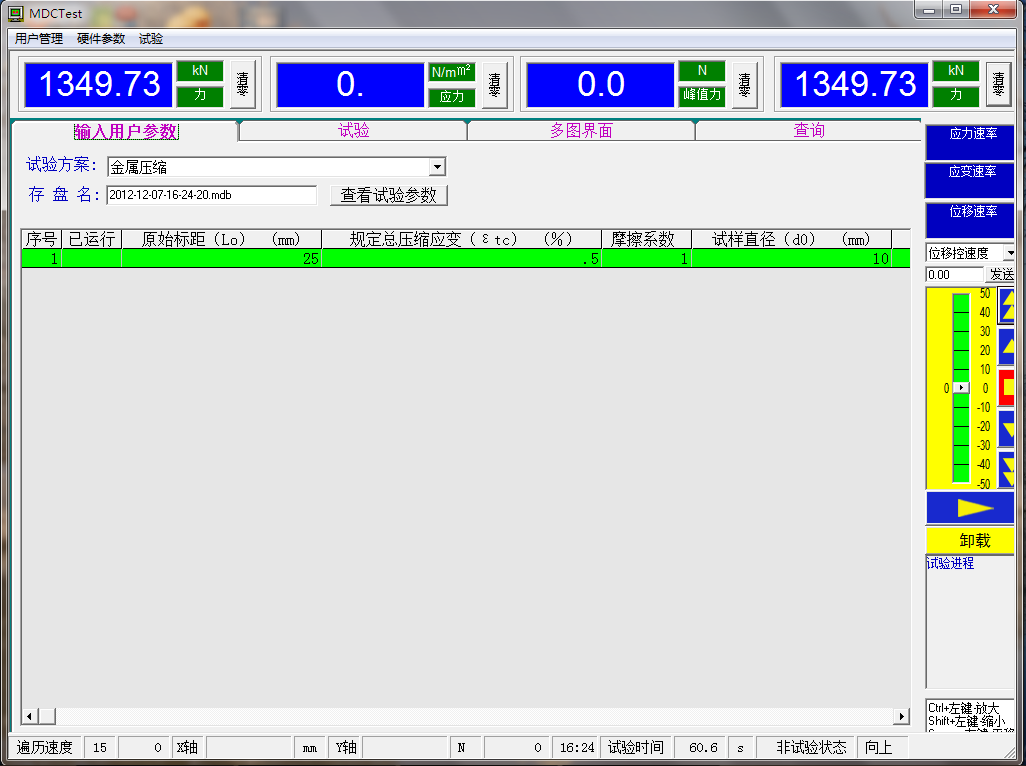
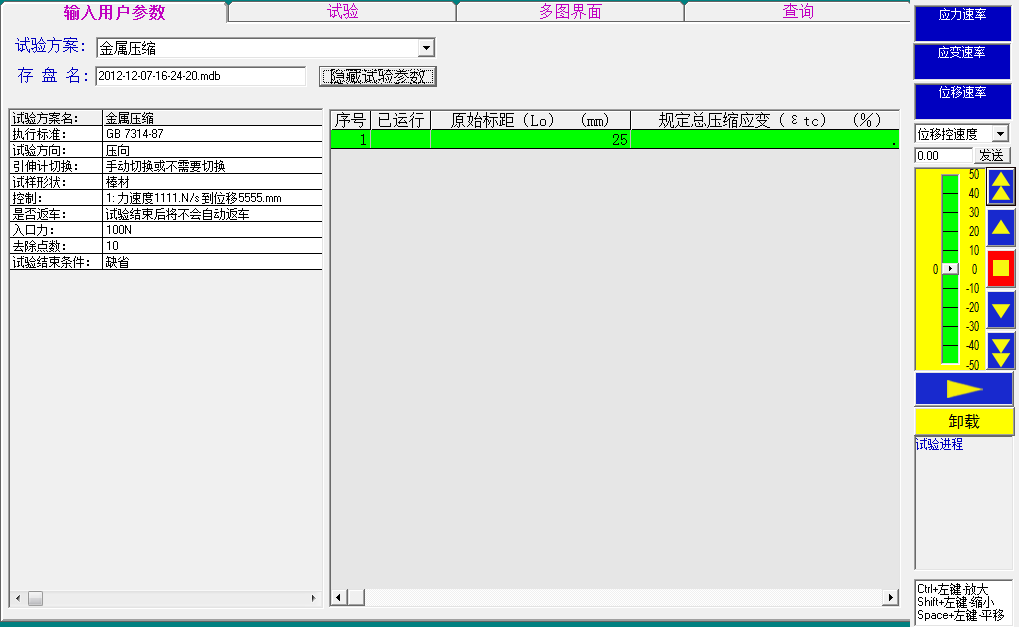
5. Implement standard management: manage test standards and test parameters and import and export test standards; Support GB, GB/T, BS, ASTM, ISO and other standards.
6. Equipment data management: can query, delete, save the test data; Unfinished batch tests can be continued.
7. Unit parameters: Various units can be added as needed.
8. Curve management and analysis:
When the test is running, the test process is displayed in real time through single or multi-graph curves;
In the non-test running state, single or multiple test curves are displayed by querying;
Curvilinear coordinates can be preset or set online;
The test data can be viewed by curve traversal and curve playback.
The curve can be translated, scaled and other operations;
Feature points can be displayed on the curve, and feature points can be modified and saved;
Curves can be printed out independently or embedded in test reports.
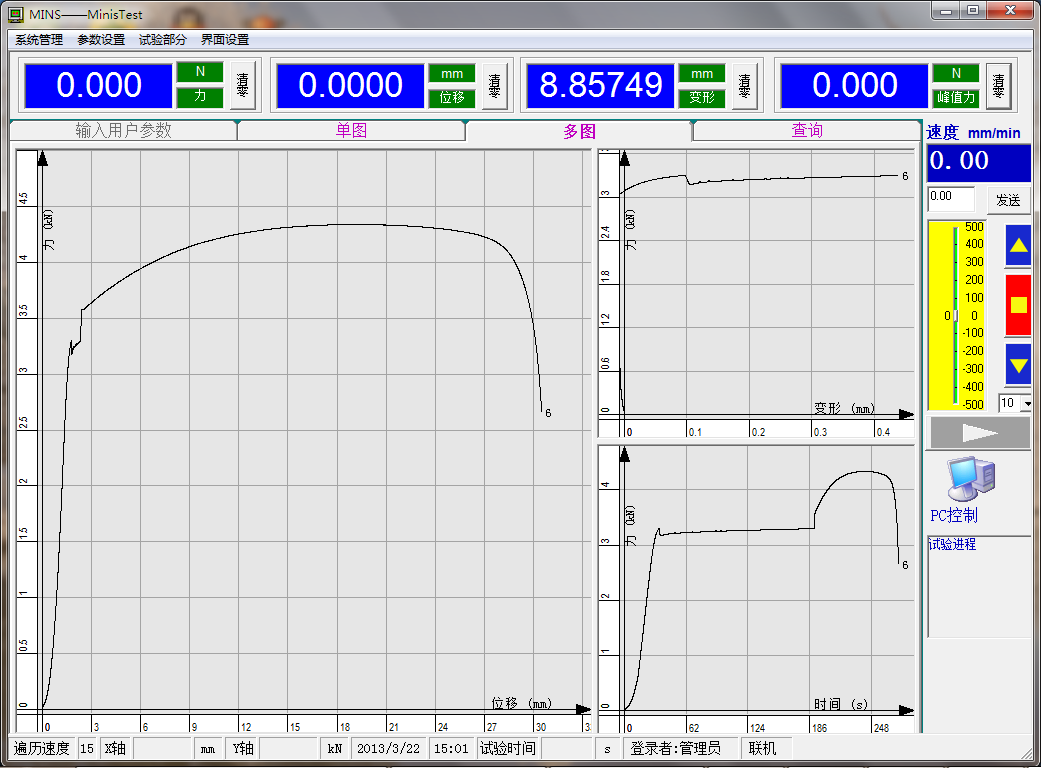
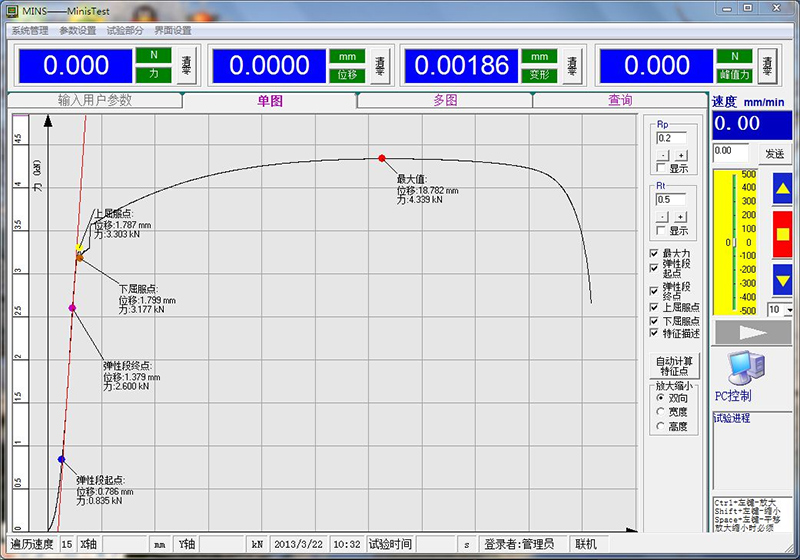
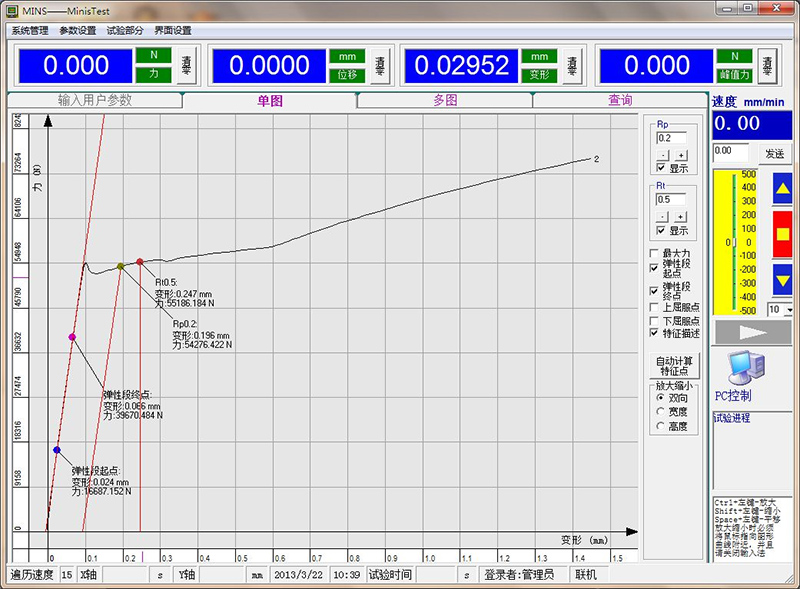
9. Automatic storage of test data: automatic storage of test data to avoid loss of test data due to unexpected shutdown.
10. Test data query function: can quickly query the previously completed test data and results according to the test time, test plan and other conditions.
11. Test report: customization, preview, output/export, merge and other functions.
Query and search test data management through test data files;
Customize the content and format of the test report through the report template;
By editing formulas and result items, most test standards and test methods can be supported.
After loading one or more test data files, the test report is generated according to the report template and can be printed out.
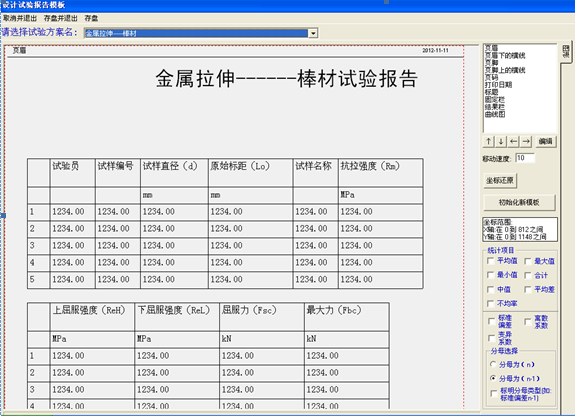
12. Modification method: Various modifications can be made to the result items according to the requirements of the standard.
13. Encryption: You can set the life of the controller through the encryption tool.
(4) Test accessories
This series of electronic universal testing machine has a wide range of applications, can be used for metal materials and components testing, can also be used for a variety of non-metallic materials and finished products testing. Different tests need to use different clamping methods, therefore, we have designed a complete variety of special test accessories according to the characteristics of various test materials, users in the purchase of testing machines, must be based on the test materials, test items, standard requirements, to choose the corresponding special test accessories.
Ordinary V-shaped round jaws are suitable for tensile test of metal bars;
Ordinary plate flat jaw is suitable for tensile test of metal plate;
Coarse teeth flat jaws for rubber, plastic and other non-metallic materials tensile test;
Corrugated flat jaws are used for tensile test of films and textiles.
Geotextile jaw is specially used for tensile test of geotextile;
The winding fixture can be used for tensile test of wire and wire.
The mosaic-type jaws are specially designed for clamping especially hard metal materials;
Compression accessories can be used for metal, non-metal material compressive test;
Three point bending and four point bending accessories are used for bending test of metal and non-metal materials.
8. Components and configuration:
(1) standard host part
| Item | WDW-1000 |
| Upper beam | 1 set(45# plate finishing) |
| Moving beam | 1 set(45# plate finishing) |
| Table | 1 set(45# plate finishing) |
| High precision ball screw | 2 sets |
| Columns | 2-4 |
| Ac servo motor and controller | 1 set (Yaskawa) |
| Reducer system | 1 set |
| Synchronous belt | 1 set (Ningbo Fulong) |
(2) Measurement display and control system
| Item | WDW-1000 |
| High precision load sensor | 1000KN 1 (0.5 grade, American World Bolt) |
| Electronic extensometer | 1 (standard distance 50mm, deformation range 10mm, Beijing Iron and Steel Institute) |
| Controller | 1 set |
| Measurement and control software | 1 set |
| Computer | 1 (mainstream configuration, HP brand) |
| Printer | 1 (A4 inkjet printer, HP brand) |
(3) Standard configuration test equipment
Wedge clamp specific: 1 set (automatic clamping);
Drawing round pliers: Φ9-Φ14, Φ14-Φ20, Φ20-Φ26, φ26-32, φ32-42;
Drawing flat jaws: 0-7, 7-14, 14-21, 21-30;
Compression attachment diameter: Φ120;
(4) Other configuration accessories (optional by users, must be purchased separately)
High temperature furnace fixed frame: 2 sets
Water cycle: 1 set
High temperature furnace and temperature control instrument; Two sets
(5) Random data
| Item | WDW-1000 |
| Packing list | 1 copy |
| Warranty certificate | 1 copy |
| Factory verification certificate | 1 copy |
| Testing machine operation manual | 1 copy |
| Software instruction manual | 1 copy |
| Software backup CD-ROM | 1 piece |
| Original random data for computer and printer | 1 set |
| Sensor, extensometer, motor, oil pump, reducer and other original random data | Etc |
9. Expandable model (extended function):
By increasing the test space, increasing the column spacing, increasing the workbench, and installing special accessories, it can do the test of large parts, components, packaging parts, special samples, etc. With the addition of high and low temperature furnace and accessories, high and low temperature tensile test of materials can be done.
 Adhesive Stripping 90 Degree Stripping Testing Machine
 Wire Twisting And Winding Integrated Machine
 Adhesive 90-Degree Peel Strength Testing Machine
 NDS-10 Digital Display Metal Material Torsion Testing Machine
 WDW-1 Microcomputer Controlled Electronic Universal Testing Machine
 CPU-1020 Cup Convex Testing Machine